
Breathedge 2 Food Machine: Repair, Upgrades & Token Unlocks
Updated · Breathedge 2 Wiki
Repair the Nutri-Pack-O-Mat with 3 Aluminum, 2 Wires, 3 Electronics and 1 Plastic. It turns biomass into nutrients, and a Nutrient pack costs 24 base nutrients. For the largest nutrient tank, fit a Plastic barrel: it holds 150 nutrients. Use Tokens at the coin slot to unlock four additional food and drink choices.
Nutrient storage: Steam Build 25584330, October 18, 2026. Other machine values: October 4 coverage of the same Build. Sleep processing: official 0.8.11 notes. Food budgets use base values before difficulty and processing effects.
In this guide
Follow the route on video
Community footage recorded before the latest fixes. Use the current material lists and patch notes alongside the route.
Bring the four repair materials
| Material | Quantity |
|---|---|
| Aluminum | 3 |
| Wires | 2 |
| Electronics | 3 |
| Plastic | 1 |
The Repair Train objective calls this step “Repair Nutri-Pack-O-Mat.” Pack the materials below, then use the machine’s repair interaction. This checklist covers the food machine; the lamp, window and kettle are separate jobs.
The same four-material requirement applies to the published repair plan and the October 4 review. Enter your inventory in the planner to see what you still need.
Load biomass, then choose your food
Nutrient pack is available initially. A locked button needs its coin unlock even when you have enough nutrients to pay the production cost. Repairs and optional food unlocks are separate requirements.
- Use the Biomass hatch to add a compatible food or nutrient resource.
- Let the machine process it into nutrients. Check the machine’s remaining space before loading another batch.
- Choose an unlocked food button once there are enough nutrients, then use Receive.
- Pick up the dispensed food; the machine drops the finished meal onto the floor.
Unlock Alcohol, Energy drink, Adrenaline and Fried worm
| Food or drink | Unlock order | Nutrients per item |
|---|---|---|
| Nutrient pack | Available initially | 24 |
| Alcohol | First token unlock | 50 |
| Energy drink | Second token unlock | 30 |
| Adrenaline | Third token unlock | 40 |
| Oxyworm kebab / Fried worm | Fourth token unlock | 60 |
Use Tokens at the coin slot to unlock the additional choices in the order below; the interaction is labeled Insert coin. If the machine has no coin slot, obtain and install that part first. The initial Nutrient pack does not require this unlock.
The last button is labeled Fried worm; its finished item is named Oxyworm kebab. The nutrient cost pays for each item you dispense after the relevant button is unlocked.
Keep the right parts for the two upgrade slots
| Slot | Parts to keep | What to compare |
|---|---|---|
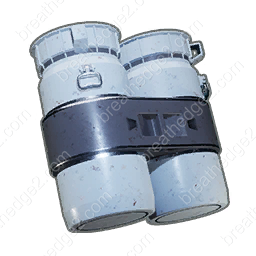
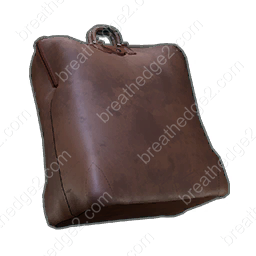
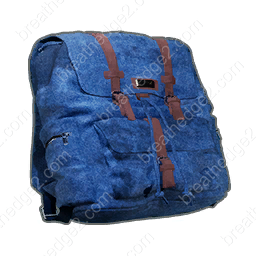
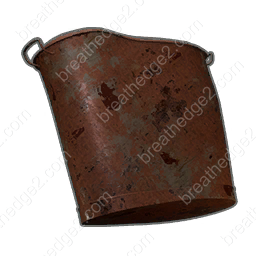
| Capacity module | Backpack, Plastic barrel, Rusty bucket, Leather bag | Capacity and any leak, processing or efficiency tradeoffs shown by the machine |
| Heavy module | Gear, Barbell plate | Processing and other effects; the Barbell plate description includes a Hazardous warning |
The machine has a Capacity module and a Heavy module. Capacity parts handle nutrient storage; heavy parts balance the machine and affect processing. A usable machine can make food before you collect every optional upgrade.
Use the replacement comparison on the machine when choosing a part. Parts can trade capacity, processing, efficiency or other effects against one another. The Backpack listed here is the blue fabric upgrade part; the crafted equipment Backpack is a different item.
Hotfix 0.8.6 fixed removed machine upgrades returning to 100 durability. Taking a worn part out and reinstalling it is not a free repair.
Choose a Plastic barrel for the largest nutrient tank
| Capacity part | Tank capacity | Gain over original |
|---|---|---|
| Original container | 90 | — |
| Plastic barrel | 150 | +60 |
| Leather bag | 135 | +45 |
| Backpack upgrade part | 120 | +30 |
| Rusty bucket | 110 | +20 |
The original container holds 90 nutrients. A Plastic barrel raises the total to 150, the largest of the four replacement containers. Leather bag is next at 135. One container fills the Capacity slot; the Heavy slot is a separate upgrade choice.
The gain column compares each replacement with the original container. Capacity is measured in nutrients and tells you how much the tank holds. Food costs, Token unlocks and processing behavior still determine how you turn those nutrients into meals.
Use the tank total to decide whether there is room for another biomass load. Dispense the food you need to free space before processing another batch. This storage comparison applies to the Nutri-Pack-O-Mat; Kettle Bobby has its own water system.
Choose biomass by its nutrient return
| Input | Nutrients |
|---|---|
| Nutrient mineral | 50 |
| Chicken feed | 50 |
| Apple | 20 |
| Bitten apple | 18 |
| Apple core | 15 |
| Half-rotten apple | 14 |
| Rotten apple | 12 |
| Lemon | 20 |
| Rotten lemon | 18 |
| Half lemon | 16 |
| Potato | 40 |
| Rotten potato | 35 |
| Pickle | 30 |
Nutrient minerals and Chicken feed each contribute 50 base nutrients. Spoiled produce can still be useful: a Rotten potato contributes 35, a Rotten lemon 18 and a Rotten apple 12.
The table shows base contributions. Machine condition and upgrade effects can change the result you actually retain. Check the tank and make food as needed instead of assuming every resource can fit into one load.
Plan complete packs and leave room for leftovers
| Supplies | Nutrients | Complete packs | Nutrients left |
|---|---|---|---|
| 1 Nutrient mineral | 50 | 2 | 2 |
| 2 Nutrient minerals | 100 | 4 | 4 |
| 1 Nutrient mineral + 1 Potato + 1 Pickle | 120 | 5 | 0 |
A Nutrient pack costs 24 nutrients. Divide the available nutrient budget by that cost and round down to count complete packs. The examples assume the full base contribution is retained and can be spent across batches.
The recycling calculator also compares other outputs. Each result spends the same budget on one food choice; do not add all of its output estimates together.
Use the sleep fix and work toward Slave to the Stomach
The official 0.8.11 notes fix sleeping failing to accelerate food processing in the recycler. Processing can now advance with sleep; the patch does not specify an exact multiplier.
Slave to the Stomach asks you to recycle 100 nutrients in the Nutri-Pack-O-Mat and rewards Hunger drain −5%. Two Nutrient minerals have a combined base value of 100, making them a useful planning target. Follow the achievement’s progress as you process them; a supply estimate does not guarantee the machine retains every nutrient.
Nutrients inside the machine and hunger restored by eating are different values. Plan your output first, then compare the food’s effects and your current hunger before setting out.
Sources and version notes
- RedRuins Softworks / Steam0.8.11 — Patch Notes
- RedRuins Softworks / SteamHotfix 0.8.6 — machine upgrade durability fix
Continue with a useful guide
Gathering Tools: Materials, Repairs & Maintenance
Match each resource to the right tool, distinguish surface and deep deposits, and pack repair materials and Spraytron charges before a gathering trip.
Read the guide
Workbench & Wardrobe: Which Upgrades Fit?
Choose the station for a tool or suit upgrade, match parts to compatible slots and gather Cardboard, Foam and Knitted teddy bears for protection.
Read the guideRecipe Unlocks: Blueprints, Gray Slots & Pickups
Find the pickups that unlock eight recipes, including Cutter and Backpack, then decode gray crafting slots, question marks and the HUD blueprint queue.
Read the guide ▶ Video chapters
Oxygen Stations & Oxyworms: Repairs and Refills
Compare public stations, portable oxygen stations and worm nests. Prepare repair supplies, battery cells and a route with places to refill.
Read the guide