
Breathedge 2 Robots & Turrets: Triggers and Safe Approaches
Updated · Breathedge 2 Wiki
A turret reacts to movement; a patrol bot reacts to behavior it treats as an offense. Repair and garbage bots have their own defenses even though they are not normally aggressive. Identify the machine before approaching it, moving loose supplies or striking its hull.
Robot behavior: Build 25584330, October 4, 2026. These are behavior and preparation notes; your surroundings and other enemies still matter when choosing a safe approach.
In this guide
Match the warning to the machine
| Machine | What draws trouble | Useful response |
|---|---|---|
| Sentry Turret | Movement in the sensor’s view | Stop moving completely; turning and tool swings also count as movement. |
| Patrol Bot | Taking property in front of the patrol | Avoid the offense; if attacked, dodge ranged shots, block baton swings or retreat. |
| Repair Bot | Close contact with stored charge; striking the hull | Give it room while it works and prepare before attempting to salvage it. |
| Garbage Bot | Interfering with its collected supplies | Keep your own dropped resources out of its work area; expect resistance when taking from its bags. |
A machine being quiet does not mean it is harmless. First identify what it is doing and what would trigger a response. A full backpack or a nearly empty oxygen tank makes experimenting with that response harder to recover from.
A sentry turret can notice more than forward movement
Standing still is a response to this turret’s movement detection. It does not provide protection from a patrol or another hazard already attacking you. The description gives no universal safe distance or exact reset timer, so do not build a return trip around either.
- Look for its sensor changing color and the weapon heating up when it detects movement.
- If you are trying to lose the turret’s attention, stop both travel and rotation. Avoid swinging a tool while holding position.
- Let the turret lose interest, then reassess your path and other threats before moving again.
An unattended supply can still attract a patrol
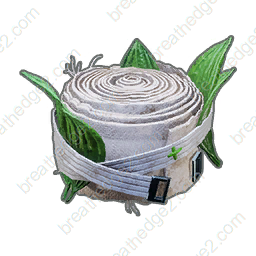
A drifting oxygen cylinder can look like a convenient emergency refill, but a nearby Patrol Bot can treat taking it as theft. Being low on oxygen does not change that response. Bring a reserve so you have time to choose another refill point.
The patrol can use both a ranged blaster and a close-range baton. Its behavior description identifies dodging shots, blocking baton attacks and flying away as possible responses. Pick one that fits your remaining oxygen and freedom of movement.
Patrols may stop pursuing, but the description also says they remember the offender. Losing immediate pursuit is not a promise that returning to the same patrol will be safe.
A repair bot can discharge electricity or spin in defense
Repair Bots service wiring and damaged structures. Their work can leave them carrying an electrical charge that discharges into a nearby character. Give a working bot room instead of treating it as ordinary scenery.
Striking its hull can trigger its asteroid-defense mode, in which its tools spin around it. That makes a casual test hit a poor way to decide whether the bot is safe to approach. Prepare the tool and supplies for the interaction you intend to perform first.
A living bot and a salvageable bot body are different situations. Use the current interaction prompt and the salvage list for the object you actually have; the presence of robot parts does not prove that every bot drops the same materials.
Dropped supplies are not safe storage near a garbage bot
Garbage Bots collect loose objects in their assigned area. They do not distinguish a valuable material dropped to reduce weight from rubbish. Check for a working bot before making a temporary pile on your route.
The bot is normally non-aggressive, but it has a defense system against attempts to take things from its bags. Recovering a pile after it has been collected is a different task from picking it up off the ground.
Use storage for supplies you need later. If you are carrying too much, calculate the weight to unload and decide which materials to store before setting off.
Prepare for the interaction, then leave room to recover
- Choose the objective: pass a turret, refill oxygen, gather supplies or salvage a body. Different actions need different preparations.
- Read your active conditions and unload enough to preserve useful movement. Critical overload disables flight.
- Carry the relevant tool in working condition, a reserve oxygen supply and any health recovery you expect to need.
- If the situation changes, return to a known safe supply point before trying again with the same depleted inventory.
Sources and version notes
Continue with a useful guide
 ▶ Video chapters
Oxygen Stations & Oxyworms: Repairs and Refills
Compare public stations, portable oxygen stations and worm nests. Prepare repair supplies, battery cells and a route with places to refill.
Read the guide
Cold & Oxygen Drain: Chill, Frostbite and Hypothermia
Compare cold’s three oxygen multipliers, hunger drain and flight penalties, then choose warmth, supplies and suit upgrades before the return trip becomes an emergency.
Read the guide
Survival Bonuses: The 60–80% Food, Water & Rest Range
Keep satiety, hydration and rest inside their inclusive bonus range, compare three benefits and use portion examples without confusing them with timed consumable buffs.
Read the guide
Slow Movement: Overload, Fatigue & Food Bonuses
Find the six fatigue, overeating and overload penalties, the three carry-weight thresholds, and the food bonuses that help you prepare for a trip.
Read the guide